Calibration frame
The calibration frame is made of finely ground steel frame, which can be used to calibrate the precise zero position of toe and camber of the 4-wheel alignment test system.
Driver Display
A 41-inch TV monitor is used to display the values of toe, camber, caster and steering wheel angle, the VIN code of the vehicle to be inspected, and vehicle entry and exit information.
It adopts side column installation or front hoisting method.

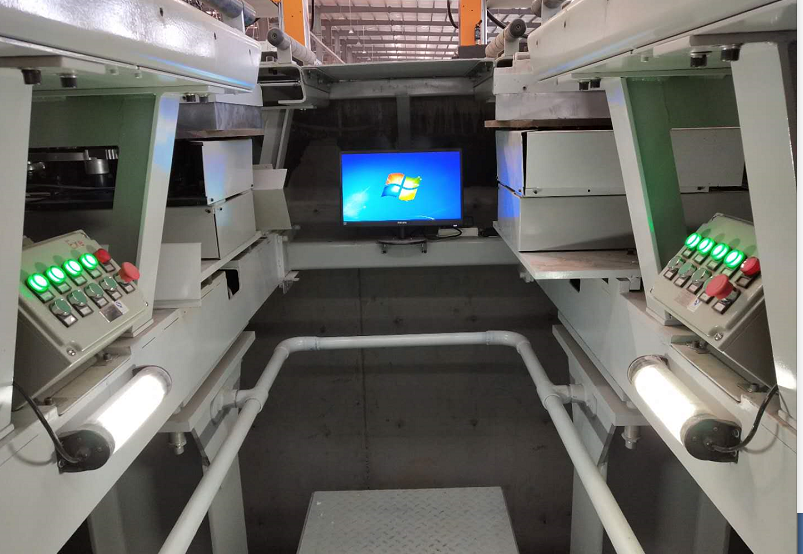
Trench Display
Use 1 or 2 19-inch LCD monitors.
Located at the front axle or rear axle, it is used for workers to adjust the toe, camber angle prompts and adjustment confirmation.
Electrical control cabinet
l The control cabinet adopts the imitation Rittal brand. Spraying color: gray RAL7035; protection level: IP54
lEquipped with Santak brand uninterruptible power supply UPS.
Host computer
lChinese version of Windows XP
lAdvantech industrial computer
Electrical components and electrical safety protection
Work Platform
l This solution uses a trench working platform to facilitate the adjustment of toe-in and camber angles.
l Meet the needs of front and rear axle adjustment, adopt patterned steel plate anti-slip surface, platform design considers ergonomics, and has fences.
Cover
l The pits between the pit and the equipment and between the parking area and the pedestrian area are covered.
The load-bearing areas such as parking and driving are made of 6mm thick patterned steel plates, which meet the load-bearing capacity of 300kg\/m2. The load-bearing capacity of the overload area is designed to be 1000kg per wheel.
There is no interference between the cover and the moving parts of the equipment.
Work pace
The detection cycle of the 4-wheel alignment instrument (from the end of scanning to the display of measurement data) is less than 1.5 minutes.
Manual operations such as adjusting the vehicle positioning parameters take up most of the work cycle time. If the front wheel angle test and the castor and inclination test are to be carried out, additional time is required.
The work cycle depends on the operator's proficiency and the condition of the vehicle. Under normal circumstances, the work cycle for testing and adjusting the toe and camber angles is about 2 minutes.
Related News
- How does the dynamic four wheel aligner avoid communication interference?
- Introduction to vehicle electrical inspection
- How to choose a good pass four wheel aligner
- What is the assembly line
- The important role of the through four wheel aligner
- The four main points of 3D laser four wheel aligner maintenance
- Working principle of electric chassis dynamometer
- Vehicle off-line comprehensive diagnostic equipment
- How to choose a good dynamic four wheel aligner
- Precautions for selecting a non-contact four-wheel aligner
- Contact type dynamic surface measurement 4 wheel alignment instrument test process
- Installation and calibration preparation of 4-wheel alignment instrument for contact dynamic surface measurement
- Contact type dynamic surface measurement 4 wheel alignment instrument wheelbase adjustment
- Safe use and precautions of contact type dynamic surface measurement 4 wheel alignment instrument
- Introduction to manual operation and zeroing of 4-wheel aligner
- Contact type dynamic surface measurement 4 wheel alignment instrument toe-in, camber, caster detection
- 4. Detection of the maximum turning angle of the wheel aligner
- 4. Kingpin inclination detection of wheel alignment instrument
- Introduction to the inspection method of 3D laser 4-wheel alignment
- Will the installation of a 4-wheel alignment have any impact on the car?
